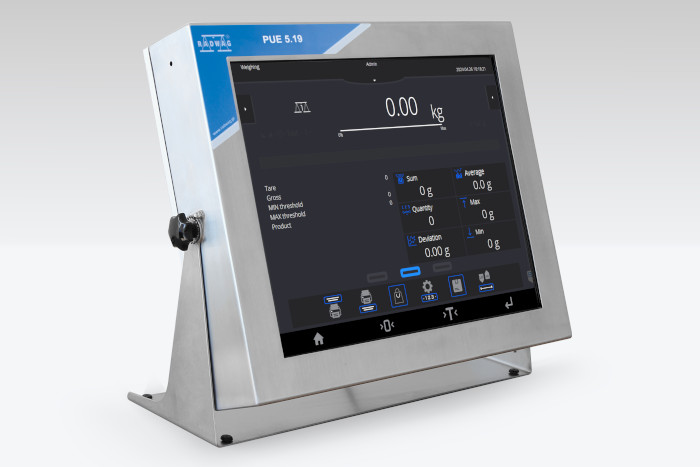
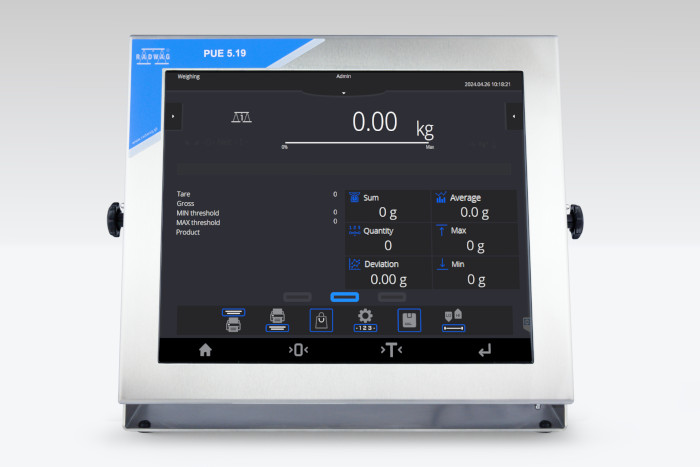
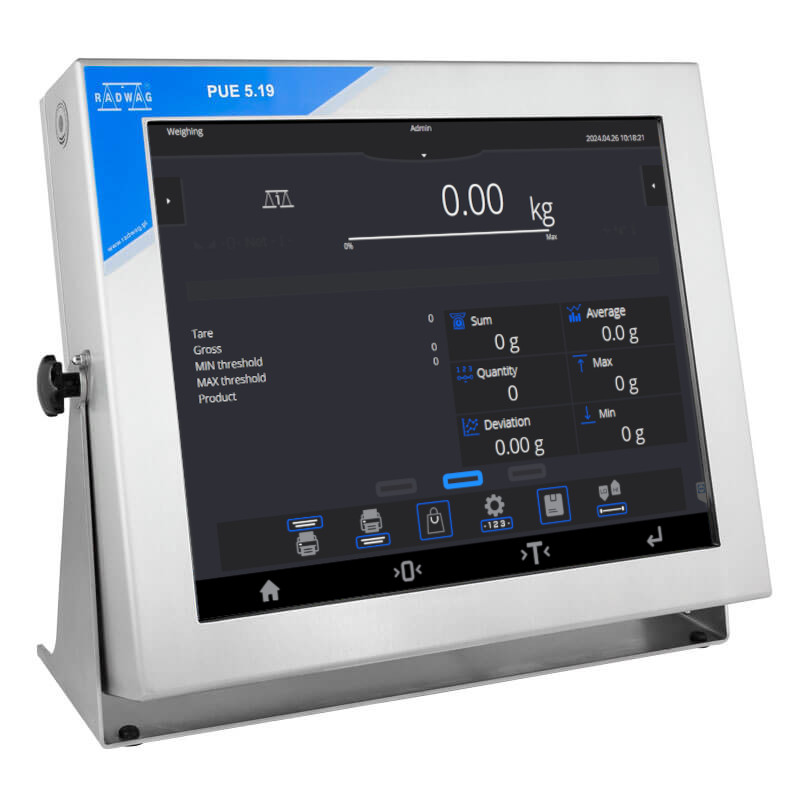
PUE 5.19IR Weighing Terminal

Radwag – Laboratory and Industrial Weighing Solutions
Selected language English
PUE 5.19IR Weighing Terminal
This image is for reference only.

PUE 5.19IR Weighing Terminal

Product code: WX-008-0037
close
Change the model:
PUE 5.15R Weighing Terminal
PUE 5.15IR Weighing Terminal
PUE 5.15C Weighing Terminal
PUE 5.19R Weighing Terminal
PUE 5.19IR Weighing Terminal
PUE 5.19C Weighing Terminal
Select all
Show me
Download
Overview
The terminals are intended to designing scales with maximum resolution of 6000 e. PUE 5 series, similarly to the basic model, are enclosed in a stainless steel housing which allows for reaching the highest IP rating, i.e. IP 66 / 67.
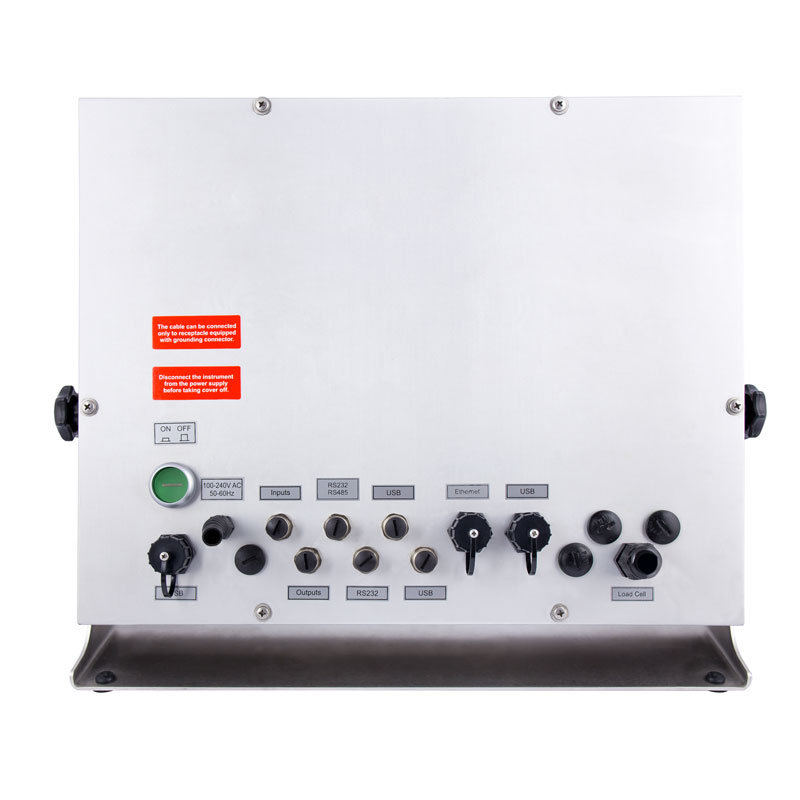
The terminals come standard with interfaces: 2 × RS232, 1 × RS485, 1 x Ethernet, 4 x USB 2.0.
PUE 5 series can be extended by additional 3 weighing modules for simultaneous operation of maximum 4 weighing platforms.

         
Intended Use:

The terminal PUE 5 series is a multifunctional weighing device. It combines the best features of a PC computer and a scale. The PUE 5 operates on basis of OS Windows, creating the best option for configuring the device to individual customer requirements through installing corresponding application.

If applied with dosing or formula making systems, the PUE 5 allows for operation with multiple weighing platforms, and simultaneous dosing with full process control. A dosing or formula making system that is configured on basis of the terminal PUE 5 series does not require an additional PC computer. Database editing is possible from the level of PUE 5 touch screen display or an optional PC keyboard.

Area of Use:
Main applications for terminal PUE 5 series:
  • Designing industrial load cell scales;
  • Multiple weighing applications supervised by a computer system through Ethernet module;
  • Possibility of connecting large quantity of additional weighing platforms to industrial terminals.
Terminal type:
PUE 5.19IR – infrared touch screen technology. IP 66 / 67 protection class. Very high brightness and readability level. High resistance to moisture and dust. Very good mechanical resistance, operation in gloves enabled (material: latex, fabric or steel chain).
 
Stainless Steel in RADWAG products
Learn about the use and maintenance of stainless steel products:
Stainless Steel in RADWAG products. Standard and special applications
Datasheet
OIML Class

III


Maximum quantity of divisions from converter

8388608


Maximum quantity of verification units

6000 e


Minimum volatge per verification unit

0.4 µV


Maximum voltage per verification unit

3.25 µV


Minimum load cell impedance

80 Ω


Maximum load cell impedance

1200 Ω


Load cell excitation voltage

5V


Maximum increase of signal

19.5 mV


Connection of load cells

4 or 6 przewodów


Display

19” graphic colour touchscreen


Device dimensions

524×420×200

 mm

Packaging dimensions

590×470×240

 mm

Net weight

14

 kg

Gross weight

15

 kg

Protection class

IP 66 / 67


Touch panel

infrared


Housing

Stainless steel


Communication interface

4×USB 2.0 (2×USB-A, 2×M12 4P), Ethernet - 2×10/100/1000 Mbit (2×RJ45 hermetic), 2×RS232, RS485 (2×M12 8P)


Optional interfaces

external buttons PRINT, TARE, START - terminal with 4IN/4OUT (M12 8P connector) is required, additional weighing platform module - max. 3 pcs, metrological parameters as in the main weighing platform


Power supply

100 – 240 V AC 50/60 Hz


Power consumption max.

75 W


Operating temperature

0 – +40

 °C

Storage temperature

-20 – +60

 °C

Relative humidity

10% – 85% RH no condensation


Operating system

Microsoft Windows 11


Processor

Intel® Celeron® J6412


Chipset

Intel® UHD Graphics for 10th Gen Intel® Processors


Memory

16 GB RAM


Data memory

SSD 128 GB


CE
2 years warranty
Videos
Complete Solutions for Mass Measurement in Pharma Industry
Functions
Dosing

Dosing

Weighing process for which reference mass has been determined together with tolerance for its determination. Dosing tolerance is given in [%] and it is calculated in relation to the reference value thus being a permissible deviation of this process. This solution is used for weighing powders, liquids and loose materials. Dosing function performance is often supported with bargraph - load indicator. For industrial scales it is possible to use a control systems of dosing process.
Labelling

Labelling

Marking products with the right symbols contributes to quick and reliable identification. The balance/scale usually transfers product mass or product quantity to the label printer. The transferred value is printed with the following information: bar code, pictogram, content, address etc. In laboratory the labelling is performed in a semi-automatic mode, for industry in an automatic one (dynamic scales).
Plus/Minus Control

Plus/Minus Control

Control of sample's mass carried out with reference to specified MIN and MAX thresholds. The weight is considered to be correct if it is comprised within threshold values. A graphic visualisation of weighing result is displayed in a form of a bar graph.
Parts counting

Parts counting

Function using mass measurement for determination of  measured items quantity. Mass of a single item is required for this process. It may be either estimated through weighment or taken from a database. For items counting the following algorithm is used: all items mass / single item mass = quantity. Function operation is supperted by a mechanism of Automatic Correction of Accuracy. This allows to update single item mass in course of the process. To a certain extend Automatic Correction of Accuracy eliminates error which may be a result of different mass values of seemingly alike single elements. For industry solutions items counting may be simultaneously carried out with checkweighing and dosing thus industry solutions feature audio signalling base informing that specified number of items has been weighed. It is possible to apply weighing systems using few platfroms of different MAX capacities and different accuracies.
Formulation

Formulation

Function supporting the mixture making process, wherein the mixture contains various components. Formulation function usually uses the balance/scale database of components. Formulation serves for monitored checkweighing of every single component with a given tolerance. It is enriched with a set of individual settings.
Statistics

Statistics

Statistiscs function registers and analyses performed measurements. This supplies the user withthe following information: Max and Min standard deviation, average value, variance, range et.
Checkweighing

Checkweighing

Checkweighing function is used for checking whether the measured sample mass is within the predefined threshold values, Low [LO] and Hgh [HI]. The thresholds are given in [g] and [kg] units. Current state of a sample being measured is signalled by means of pictorgams located on a display for laboratory balances, for industrial scales Stackligt System is used. This visual +/- inspection is in operation during segregation, control or packing process of products for which mass has bees determined with a specifaied tolerance, eg. 12860 g 961
Documentation
Datasheet
Data Sheet Data Sheet
Data Sheet

Show me
Show me
Download
Download

Choose more product:
Show me Show me DownloadDownload
User Manuals
Start up Guide
Start up Guide
Show me
Show me
Download
Download
(1.02 MB)
Software Manual
Software Manual
Show me
Show me
Download
Download
(1.23 MB)
User Manual - PUE 5
User Manual - PUE 5
Show me
Show me
Download
Download
(2.82 MB)
Conformity Declarations
Conformity Declaration
Show me
Show me
Download
Download
(0.04 MB)
Publications and Brochures
PUE 5 Weighing Terminal
Show me
Show me
Download
Download
(2.10 MB)
Stainless Steel in RADWAG products. Standard and special applications
Show me
Show me
Download
Download
(2.23 MB)
Accessories
R-LAB

Accessories

Newsletter

Subscribe to the newsletter if you would like to receive RADWAG news.

View more
Radwag Balances and Scales
Torunska 5
26-600 Radom
Poland
tel.: +48 48 386 60 00
e-mail: export@radwag.com
TIN: PL7960000327
Vimeo Radwag YouTube Radwag Facebook Radwag LinkedIn Radwag
© 2024 RADWAG Balances and Scales. All rights reserved.

Select language

×
Change language AlbanianAlbanian
Change language DanishDanish
Change language NederlandseNederlandse
Change language EstonianEstonian
Change language FinnishFinnish
Change language HungarianHungarian
Change language IcelandicIcelandic
Change language KazakhKazakh
Change language LatvianLatvian
Change language LithuanianLithuanian
Change language MacedonianMacedonian
Change language NorwegianNorwegian
Change language PortuguesePortuguese
Change language RomanianRomanian
Change language RussianRussian
Change language SlovakSlovak
Change language SlovenianSlovenian
Change language SwedishSwedish
Change language UkrainianUkrainian
Change language SerbianSerbian
Change language MontenegrinMontenegrin
Change language page on Deutsch Deutsch
Change language page on Español Español
Change language page on Français Français
Change language page on Italiano Italiano
Change language page on Polski Polski
Change language page on Türkiye Türkiye
Česky
Português (Brasil)
Change website to USA USA
Change language page on 中文 中文
Presentations Presentations Presentations
Subscribe Subscribe Subscribe
Radwag in Facebook Radwag in Facebook Facebook
Radwag in YouTube Radwag in YouTube Youtube
Radwag in Vimeo Radwag in Vimeo Vimeo
Radwag in LinkedIn Radwag in LinkedIn LinkedIn
Webinars Radwag Webinars Radwag Webinars
close
E-mail:
Company name:
Name:
I consent to the processing of my personal data for marketing purposes by Radwag Wagi Elektroniczne Witold Lewandowski.
I consent to receive marketing and product-related messages by electronic means from Radwag Wagi Elektroniczne Witold Lewandowski.
I have read the Privacy Policy of RADWAG Wagi Elektroniczne Witold Lewandowski.
lock_openI want to access the files
close
Slide to go back ↩